
We are going to look at Solar Panel Maintenance Tips for Long-Lasting Performance in Africa
Buying a solar system is one of the smartest financial decisions you can make in Africa. It reduces your dependence on an unreliable grid, cuts your electricity costs, and pays for itself over time. But here is something many solar owners discover too late: a solar system that is not properly maintained starts losing money just as quietly as it once started saving it.
Panels lose output. Batteries wear out faster than they should. Inverters fail without warning. Connections corrode. All of these problems are preventable — and most of them are the direct result of skipping simple, routine solar panel maintenance tips that takes less time than a car service.
Africa presents specific maintenance challenges that guides written for European or North American buyers simply do not address. Harmattan dust. Red laterite soil. Salt air along coastlines. Intense heat. Rainy seasons that bring moisture into connections. This guide is written for those conditions.
Whether you have a small rooftop system for your home or a larger setup powering a business, this guide covers everything you need to keep your solar investment performing at its best — for decades.
A solar system that is well maintained can last 25 to 30 years. One that is neglected often starts underperforming within three to five.
Why Maintenance Matters More in Africa Than Anywhere Else
Most solar manufacturers test their products in controlled laboratory conditions — a clean room at 25 degrees Celsius, no dust, no salt, no humidity swings. The warranty figures and efficiency ratings on the box reflect those ideal conditions.
Real life in Africa is very different. Consider what your system faces on a typical year: months of harmattan or dry season dust, afternoon temperatures that push panel surfaces above 65 degrees Celsius, rainy seasons that drive moisture into cable joins and battery terminals, salt air if you are near a coast, and in some areas, insects and small animals that nest in inverter housings or behind panel arrays.
None of this means solar does not work in Africa — it absolutely does, and it works better here than in most parts of the world because of the sunshine. But it does mean the system needs more attentive care than the manual suggests. The good news is that maintenance is not complicated. These solar panel maintenance tips will give you a head start to get the maximum output from your solar systems. The maintenance is mostly observation, cleaning, and knowing what to look for before small issues become expensive ones.
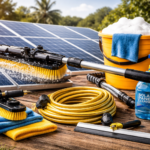
What You Need Before You Start
You do not need expensive equipment to maintain a solar system. Most homeowners can handle routine maintenance with basic tools:
A soft cloth or microfibre sponge (for panel cleaning — never use anything abrasive)
A bucket of clean water and a small amount of mild soap for heavy dirt
A multimeter (for checking voltage across batteries and connections — costs under $15)
A soft brush with a long handle (for rooftop panels you cannot reach by hand)
A notebook or phone to record readings and dates for comparison over time
Insulated gloves when inspecting wiring or battery terminals
A torch for inspecting the underside of panels and dark inverter spaces
For larger systems or anything involving the wiring inside your inverter or charge controller, always call a qualified solar technician. Electrical faults carry serious risk and should not be handled without proper training.
Read: Best Tools to Clean Solar Panels: Safe and Affordable Options for African Buyers
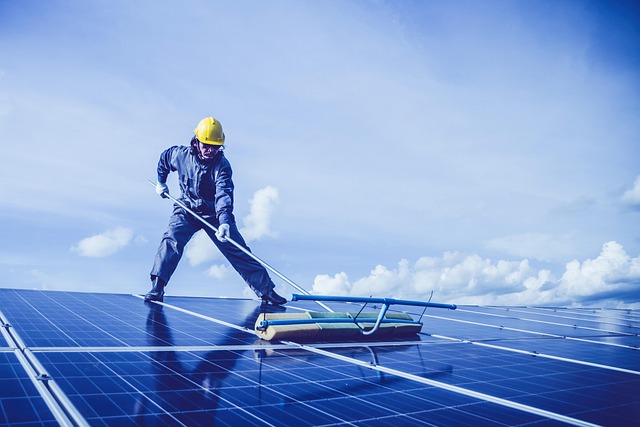
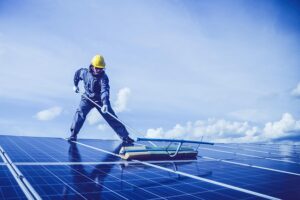
Clean Your Panels — The Highest-Impact Task
Of every maintenance task on this list, cleaning delivers the most immediate and measurable result. Dust buildup on solar panels is the single biggest cause of efficiency loss in Africa. A panel covered in a fine layer of dust — the kind you might not even notice from the ground — can lose 15 to 25 percent of its output. During harmattan season in West Africa, that figure can reach 30 percent or more.
The physics is simple: solar cells convert photons from sunlight into electricity. When dust, dirt, soot, or bird droppings sit on the glass surface, they block those photons before they reach the cells. Fewer photons in means less electricity out.
How Often to Clean
Every two to three weeks in dusty, dry, or semi-arid environments (Sahel, northern Ghana, northern Nigeria, eastern Kenya dry regions)
Once a month in urban areas with traffic pollution or near construction activity
Every six to eight weeks in wetter, cleaner regions or where regular rain provides some natural rinsing
After every dust storm, harmattan event, or period of heavy wind regardless of your regular schedule
Immediately after bird droppings appear — these concentrate damage on a small area and etch glass if left
How to Clean Safely and Effectively
Clean early in the morning before the panels heat up. Water on a hot panel surface can cause thermal stress and micro-cracks over time.
Use plain water and a soft cloth or sponge for routine cleaning. This is enough for dust.
For heavier dirt, soot, or salt deposits, add a small amount of mild soap. Rinse thoroughly afterwards — soap residue left on the glass creates a film that attracts more dust.
Wipe in smooth, straight strokes rather than circular motions. Circular wiping can spread grit and leave micro-scratches.
For rooftop panels, use a long-handled brush and a garden hose if safe access is available. Never stand on panels or lean heavy equipment against them.
After cleaning, check whether your charge controller or inverter shows an improvement in input power. This confirms you have made a real difference.
Read: How to Clean Dust from Solar Panels in Nigeria and Africa
Pro tip: Run your finger across the panel surface before cleaning. If it leaves a visible clean line through dust, your panels need attention right now.
Warning: Never use high-pressure water jets directly on panels — this can force water into the frame and damage the sealing around the cells. A gentle hose or a bucket is sufficient.
Inspect Your Panels for Physical Damage
Solar panels are designed to be tough — they are tested to withstand hail, wind, and years of outdoor exposure. But physical damage does occur, and catching it early prevents small problems from becoming irreversible ones.
Walk around your system and visually inspect every panel at least once every three months. You are looking for:
What to Look For
Cracks or chips in the glass surface. Even a hairline crack allows moisture into the panel over time, causing corrosion of the cells inside. A cracked panel needs replacing.
Discolouration or dark patches on the back of the panel. This is called hotspot damage, caused by a cell overheating due to shading or internal failure. Hotspots progressively destroy the cell.
Delamination — when the protective layers inside the panel start to separate, visible as bubbling or peeling behind the glass. Common in cheaper panels exposed to intense heat.
Loose or damaged frame corners. The aluminium frame protects the panel’s edges. Loose corners allow water ingress.
Discoloured or yellowed backsheet. The white or clear backsheet on the underside of the panel protects the cells from moisture. Yellowing or cracking of this layer is a sign of UV degradation.
What to Do If You Find Damage
Minor frame issues can sometimes be resealed with appropriate outdoor sealant. Cracked glass, delamination, or hotspot damage means the panel needs professional assessment — and likely replacement. Do not ignore damaged panels: a compromised panel can affect the performance of every other panel in the same string, and in extreme cases create a fire risk.
Read: Off-Grid vs. Hybrid Solar Systems: Which Is Right for You in Africa?
Pro tip: Take a photo of each panel during every quarterly inspection and save them by date. Side-by-side comparisons over time reveal gradual discolouration or damage that is invisible in a single check.
Check All Wiring and Electrical Connections
Electrical connections are the most overlooked part of solar system maintenance — and one of the most dangerous to neglect. A loose or corroded connection does not just waste energy. In extreme cases, it creates heat that can start a fire.
In African conditions, connections face specific threats: high heat causes expansion and contraction of metal contacts, eventually loosening them. Humidity and salt air corrode exposed contacts. Insects build nests in junction boxes and inverter housings, blocking ventilation and damaging wiring.
What to Check Every Six Months
MC4 connectors (the plug-and-socket connections between your panels and cables): check that they are fully clicked together and show no signs of overheating — discolouration or melting around the connector is a serious warning sign.
Cable condition: look for cracking, brittleness, or exposure of the wire inside. UV degradation of cable insulation is common after five or more years, especially if cables are exposed to direct sun.
Battery terminals: check for white, blue, or green powdery deposits, which indicate corrosion. Clean terminals with a baking soda and water solution, rinse, dry, and apply a thin coat of petroleum jelly to prevent recurrence.
Earth connection: your system should be properly earthed. Check that the earth wire is still firmly connected and that the earth rod (if visible) has not been disturbed.
Junction box on the back of each panel: lift the cover if accessible and check for moisture, insect nests, or corroded contacts inside.
Warning: Never disconnect or reconnect MC4 connectors under load — with panels producing power and the circuit live. Always shade the panels first or work at night to isolate the circuit before touching connections.
Read:
Monitor and Protect Your Battery Bank
For most solar owners in Africa, the battery is the most expensive component in the system after the panels. It is also the component most likely to fail prematurely — not because batteries are unreliable, but because of how they are used and cared for.
Understanding your battery type is the first step to maintaining it correctly, because lead-acid and lithium batteries have very different needs.
Lead-Acid Batteries (Flooded and Sealed)
Lead-acid batteries are still common in off-grid African systems because of their lower upfront cost. They are also the most demanding in terms of maintenance.
Check electrolyte levels every two months for flooded lead-acid batteries. Top up with distilled water only — never tap water or battery acid. The plates should be submerged at all times.
Check terminal voltage with a multimeter. A fully charged 12V lead-acid battery should read 12.6 to 12.8 volts. Below 12.0 volts at rest indicates a discharged or failing battery.
Avoid discharging below 50% capacity regularly. Deep, frequent discharges are the fastest way to shorten lead-acid battery life. If you are regularly draining your batteries flat during long outages, your battery bank is too small for your load.
Keep batteries in a ventilated space. Charging lead-acid batteries produces hydrogen gas. In an enclosed, unventilated room this creates an explosion risk.
Check for swelling, cracking, or a sulphurous smell. These are signs of a battery in serious distress. Do not charge a swollen or cracked battery.
Lithium Batteries (LiFePO4 and Li-ion)
Lithium batteries are increasingly common in newer systems due to their longer lifespan, deeper discharge capability, and lower maintenance. They are also more tolerant of heat and partial charging.
Use the battery management app if your battery includes one (most modern lithium packs do) to monitor individual cell voltage and health.
Avoid charging at very high temperatures. Lithium batteries should not be charged when the ambient temperature is above 45 degrees Celsius — a real concern in some African locations during the hottest months.
Do not store lithium batteries fully discharged for extended periods. If a system is going unused for weeks or months, leave the battery at around 50% charge.
Check for any heat or swelling around the battery housing. Unlike lead-acid, lithium batteries show fewer obvious warning signs before failure, making monitoring apps valuable.
General Battery Maintenance for All Types
Keep batteries clean and dry. Wipe down housings monthly and check that no water has pooled around the base.
Maintain a battery log. Record voltage readings and charge levels monthly. A battery that is consistently reading lower than it used to is degrading.
Replace batteries in groups. If one battery in a bank fails, replacing only that one while leaving older batteries in the circuit causes the new battery to work harder and fail sooner.
Pro tip: In hot climates, battery life is significantly extended by keeping them out of direct sun and in the coolest available location — a shaded interior room is ideal.
Read: Best Solar Inverters for Africa: Complete Buying Guide (2026)
Keep Your Inverter Healthy
The inverter is the brain of your solar system. It converts the DC electricity your panels generate into the AC electricity your appliances use. It also manages battery charging, monitors system performance, and protects the system from faults. When the inverter fails, the entire system stops working.
Inverters are generally reliable, but they have two common weaknesses: heat and dust. Both are abundant in Africa.
Monthly Inverter Care
Check the display or app for error codes. Most modern inverters record faults in a log. Review this monthly and look up any unfamiliar codes in the manual or manufacturer’s website.
Listen for unusual sounds. A healthy inverter runs quietly with a low hum from its cooling fan. Loud buzzing, clicking, or an intermittently running fan that sounds like it is straining can indicate overheating or a failing component.
Feel the housing temperature. The inverter should feel warm but not hot to the touch. If it is too hot to hold your hand against, it is overheating.
Check that the ventilation grilles are clear. Dust accumulates on inverter vents quickly. Use a soft dry brush or compressed air to clear them monthly.
Every Six Months
Check input voltage from the panels. Compare it to what your system was producing when new. A significant unexplained drop in input voltage points to panel, wiring, or connection problems upstream.
Check the output voltage. It should be stable within your local standard (230V in most of Africa). Fluctuating output can damage sensitive appliances.
Inspect the inverter’s location. It should be mounted on a wall in a shaded, ventilated space — not in direct sun, not in a sealed box, and not near a heat source. Many inverter failures come from poor siting that was never corrected.
Warning: If your inverter shows a red fault light and will not restart after a power cycle, do not attempt to open the housing yourself. Internal capacitors retain dangerous voltages even after the system is switched off. Call a qualified technician.
Manage the Environment Around Your Panels
The area around your solar installation changes over time, often in ways that gradually reduce your system’s output without any obvious single moment of failure. Trees grow. New buildings go up. Water tanks get added to rooftops. What was a clear, unobstructed installation when it was first set up can become partially shaded within a few years.
Shading is disproportionately damaging to solar output. Because solar cells in a panel are connected in series, a shadow covering just one cell can reduce that panel’s total output by 30 to 50 percent. If your panels are wired in a series string — as they commonly are — one shaded panel drags down the output of every other panel in the string.
Every Three Months
Walk around your installation at different times of day — morning, midday, and late afternoon. Look for shadows that fall on any part of the panels. Note the source.
Trim any tree branches that have grown close to the panels. A branch that is not shading panels today may shade them in six months as it grows.
Check for new structures nearby — water tanks, satellite dishes, new buildings, or added rooftop equipment that cast shadows you did not plan for.
Clear fallen leaves, fruit, or bird nests from around and behind panels, especially after the rainy season.
Pro tip: If some panels are unavoidably shaded and you are building a new system or expanding an existing one, ask about microinverters or DC power optimisers. These devices allow each panel to operate independently, so one shaded panel no longer punishes the rest.
Check Your Charge Controller
The charge controller sits between your solar panels and your batteries. Its job is to regulate the voltage and current from the panels so that the batteries charge correctly without being overcharged or damaged. Most modern systems use MPPT (Maximum Power Point Tracking) charge controllers, which are more efficient and provide more information than older PWM types.
Monthly Checks
Check the display for battery voltage, charging current, and daily energy totals. Compare these figures over time. A charge controller that consistently shows lower values than usual is telling you something has changed upstream or downstream.
Inspect the controller for heat. Like inverters, charge controllers need ventilation. Overheating is the most common cause of premature failure.
Check the connections into and out of the controller. These carry significant current and must be tight, clean, and undamaged.
Annually
Review your charge controller settings — particularly the battery type and charge voltage settings. These are sometimes lost after power outages or firmware updates and incorrect settings can silently undercharge or overcharge your batteries.
Check whether a firmware update is available from the manufacturer. Charge controller software is periodically updated to improve performance and fix bugs.
Seasonal Maintenance for African Conditions
Africa’s climate is not uniform, but most of the continent experiences two distinct seasons that require different maintenance priorities.
Dry Season / Harmattan Preparation (West Africa) and Dry Season (East and Southern Africa)
Increase cleaning frequency to every two weeks or after significant dust events.
Check and tighten all cable connections before the season starts — heat causes expansion that loosens connections over time.
Ensure battery water levels are correct before extended periods of high heat.
Check that inverter and charge controller vents are completely clear — dust clogs vents faster in dry season.
Rainy Season Preparation
Inspect all cable entry points into buildings, junction boxes, and the inverter housing for gaps where water could enter. Seal with appropriate weatherproof compound.
Check panel frame seals — small cracks in the sealant around the panel frame allow water behind the glass.
Ensure battery area is not at risk of flooding. Batteries, especially lead-acid, must not sit in water.
Check earthing connections. Earthing is especially important during lightning season.
After the first heavy rains, check whether runoff from the roof is hitting panels at a high angle that could dislodge cables or loosen mounting hardware.
Your Complete Maintenance Schedule at a Glance
Weekly
Quick visual check of panel cleanliness from the ground
Check inverter display for any fault indicators
Monthly
Full panel cleaning
Inverter vent cleaning
Battery terminal inspection and voltage check
Record charge controller daily energy totals and compare to previous months
Check electrolyte levels in flooded lead-acid batteries
Every Three to Six Months
Full visual inspection of all panels for cracks, discolouration, or delamination
Check all wiring and MC4 connectors
Inspect and clean battery terminals
Check for new shading sources around the installation
Trim trees or branches approaching the panels
Verify charge controller settings
Annually
Professional system inspection — check all connections with a thermal camera or clamp meter
Full battery health assessment
Inverter firmware update check
Review system performance against installation baseline
Inspect mounting hardware for rust, loosening, or corrosion
When to Call a Professional
Routine cleaning and visual inspections are well within the ability of any homeowner. But some situations require a qualified solar technician:
Any fault code on the inverter that does not clear after a restart
Output that has dropped by more than 20 percent and cannot be explained by cleaning, shading, or heat
Any signs of burnt wiring, melted insulation, or discolouration around connections
A battery that will not hold charge despite being new or recently serviced
Any issue involving the main AC isolator, grid connection, or earthing system
Annual professional servicing — even if everything appears fine, a trained eye with a multimeter and thermal camera catches problems invisible to the naked eye
The cost of an annual professional inspection is typically a fraction of the cost of replacing a component that failed because a small problem went undetected.
Frequently Asked Questions
How long do solar panels last with proper maintenance?
Quality panels from reputable manufacturers are warranted for 25 years and often last 30 or more. With proper maintenance — regular cleaning, preventing moisture ingress, managing heat — panels degrade at around 0.5 percent per year, meaning a panel is still producing at around 87 percent of its original output after 25 years. Neglected panels in harsh climates can degrade two to three times faster.
Does rain clean my solar panels in the rainy season?
Light rain removes loose surface dust and can maintain relatively clean panels between manual cleanings. It cannot remove heavy buildup, bird droppings, soot from cooking fires, or the oily residue from traffic pollution. Rain also leaves mineral deposits as it evaporates, especially from hard water. Manual cleaning is still required even in areas with regular rainfall.
My inverter is showing less output than last year. What is wrong?
Start with the simplest explanation: clean the panels and check for shading. If output does not improve, check the inverter’s input voltage from the panels. If that is lower than expected, inspect wiring and MC4 connections for corrosion or loosening. If input voltage is normal but output is still low, the inverter itself may be degrading and needs professional assessment.
How do I know if my battery needs replacing?
The clearest sign is a battery that charges quickly but discharges quickly — reaching ‘full’ in a short time but running out faster than before. This indicates reduced capacity. Measure resting voltage after a full charge: a 12V battery reading below 12.4V at rest has significant capacity loss. For lithium batteries, use the management app to check state of health (SoH) percentage.
Is it safe to clean solar panels myself?
For ground-mounted or easily accessible panels, yes — plain water and a soft cloth is safe and effective. For rooftop panels, safety depends entirely on your roof access. If there is any risk of falling, do not attempt it yourself. Use a long-handled brush from a safe position, or hire someone. No solar panel is worth an injury.
What happens if I ignore maintenance for one year?
In a dusty African climate, a year without cleaning can cost 15 to 30 percent of annual energy output — permanently lost energy you paid for through your initial investment. Unchecked connections may corrode. Battery water levels in flooded batteries may drop, damaging the plates. Shading may increase as trees grow. Most of these losses compound: a system neglected for a year typically takes more time and money to bring back to full performance than the annual maintenance would have cost.
Should I cover my panels during an extended period of non-use?
Only if absolutely necessary. Covering panels prevents them from charging the batteries — which in turn means batteries can self-discharge to a damaging level over weeks. If you are away for an extended period, it is better to leave the system running with a small maintenance load (such as a single light or phone charger) than to cover the panels and return to flat, potentially damaged batteries.
Final Thoughts
A well-maintained solar system is one of the most reliable sources of energy you can own in Africa. It does not go on strike. It does not run out of fuel. It does not require permits or supply chains to keep running. It just needs your attention — consistently, simply, and regularly.
Most of the solar panel maintenance tips in this guide costs nothing except a little time. The cleaning kit you need fits in a small bucket. The inspections take less than thirty minutes. The log you keep is just a few numbers in a notebook. Together, they are the difference between a system that performs well for thirty years and one that disappoints you within five.
The sun is not going anywhere. Neither is your need for reliable power. Maintain your system and it will repay you many times over.
Related reading
Why Solar Panels Lose Efficiency (And How to Fix It Fast)
Best Solar Generators for Africa 2026 | How to Calculate Your Solar Power Needs
Disclosure: This article may contain affiliate links. Purchases through these links support our work at no extra cost to you.